What is "The Green Art Box?" A collection of environmentally friendly kids' art projects that are; clever, imaginative
and easy-to-create! Inspired by the reuse of common household recyclables! A handy resource for teachers, parents
and home-school art curriculums. Create "green" art today!  © 2009 Broken Box Designs™

Thursday, September 25, 2008

Leaf Stencil Squares


PROJECT OVERVIEW: For preschool on up
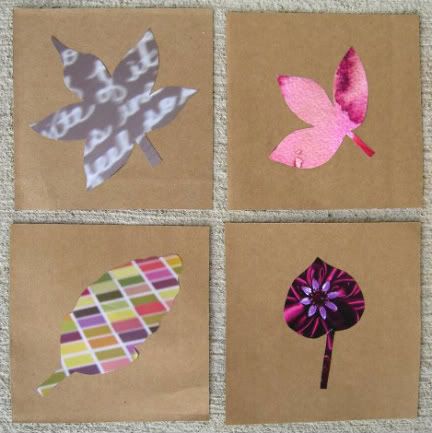
Study the DIFFERENT shapes of Fall leaves and create art using each leaf as a stencil to trace its shape. This project also studies different 2d textures such as: print, solid color, patterns and pictures.

SUPPLY LIST:
- 4, 8"x8" squares of brown grocery bags (measure and cut the squares from a bag)
- 4, different shaped leaves (the leaf should fill up the majority of your 8" squares, aim for about 5" sized leaves) NOTE: Avoid multiple leaves on a stem, just use single leaf shapes)
- pencil
- scissors
- ruler
- glue or tape
- The following four different scrap (keyword) papers all need to be about an inch larger than each leaf, so about a 7" square). Again, try to use scrap-type papers:
1) - 1 sheet scrap paper with PRINT (newspaper or magazine prints will work best)
2) - 1 sheet scrap paper with mostly SOLID COLOR (can have some different colors or texture but should be mostly solid)
3) - 1 sheet scrap paper with a PATTERN (think polka-dots, plaid, stripes, or random shapes like clouds or balloons).
4) - 1 sheet scrap paper with a PICTURE (could be a scrap photo, illustration, painting, etc) NOTE: let the picture get cropped into your leaf stencil, we don't want the whole picture to be perfectly fit into leaf, rather it should look like it is bleeding off)

DIRECTIONS:
1) Find 4 different shaped leaves (the leaf should fill up the majority of your 8" squares, aim for about 5" sized leaves) NOTE: Avoid multiple leaves on a stem, just use single leaf shapes. Press in book if they need to be flattened some.

2) Cut and measure 4, 8" squares from brown grocery bags. Set aside.

3) Lightly trace in pencil the....
a) outline of leaf #1 on the center of your scrap PRINT paper.
b) outline of leaf #2 on the center of your scrap SOLID COLOR paper.
c) outline of leaf #3 on the center of your scrap PATTERNED paper.
d) outline of leaf #4 on the center of your scrap PICTURE paper.

4) Carefully cut the leaf shapes out of each paper piece (so that you end up with 4 leaves in the different paper types).

5) Apply a thin layer of glue to the back side of each leaf cutout. Adhere ONE leaf cutout to the center of each brown paper square. Press firmly and lay book on top so the cutouts dry flat.

6) Once dried, decorate your room for Fall with these pieces or make a book... its up to you! Go a step further and identify each leaf, and label the leaves with their tree :)

Monday, September 8, 2008

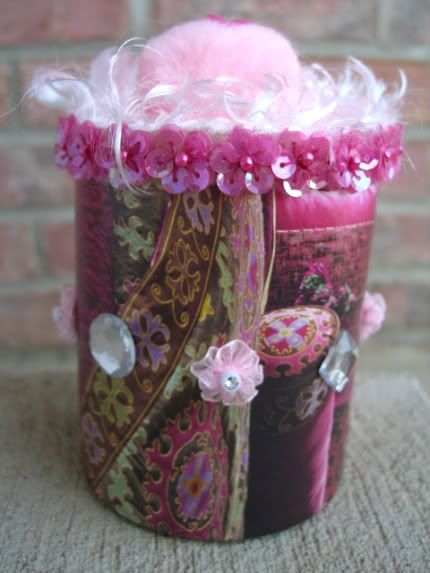
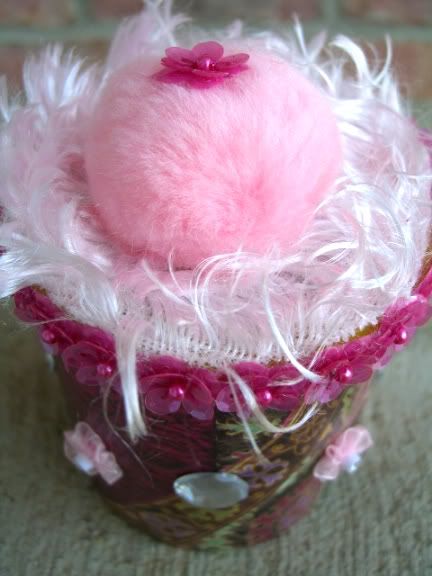
Trinket Tin


PROJECT OVERVIEW:
This project has many decorating possibilities! The goal is to convert an empty food tin/canister into a decorative "Trinket Tin" that might keep jewelry, coins, and other trinkets.
TIP: Consider following a theme for your tin to express yourself! For example, if you like cats you could find cat pictures in magazines and glue them to your canister. :) 
Have fun - ANYTHING GOES!!!!

SUPPLY LIST:
- empty tin canister and lid (roughly small peanut size)
- scrap papers
- scrap embellisments (glitter, sequins, stickers, buttons, etc)
- ribbon/bow, etc
- glue or double sided adhesive tape (scrapbooking dots)

DIRECTIONS:
1) Rinse out your tin and lid.

2) Cover the entire outside of tin/canister with scrap papers (using glue or tape). Be creative, there are many ways to cover the tin such as: wrapping with paper, covering with torn paper scraps, etc.

3) Further decorate your Trinket Tin with found embellishments such as: glitter, sequins, stickers, buttons, etc.

4) Decorate the lid with some sort of "topper" such as a bow or ribbon. Be creative, again...anything goes!

5) Set your Trinket Tin aside to dry.

6) When dry, fill with trinkets for safekeeping. Perfect for your bedroom dresser :)

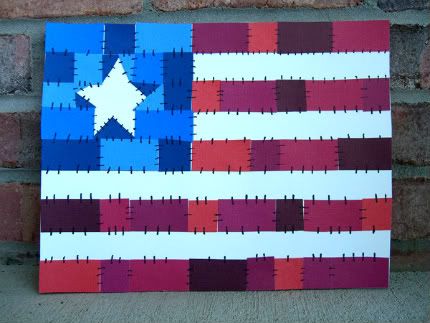
Quilted-Collage American Flag

Photobucket Image Hosting
PROJECT OVERVIEW:
Create an American Flag in a quilted-style using paper scraps from (magazines, mail, scrap drawer, etc). Kids will use the paper pieces as if they were quilt sections. Patch them together on a letter sized piece of paper, glue down and then use permanent black marker to create a stitch-effect (making the flag look like it was sewn together like a quilt).

The quilted style is to symbolize our country's history, representing unity/togetherness and the melting-pot of our citizens.

This project works great as individual or group art. Classrooms and large groups might try this on a large sheet of paper or cardboard to cover an entire wall!

SUPPLY LIST:
- letter sized sheet of card stock or card board
- scrap papers from: magazines, junk mail, newspaper, etc.
- pencil
- scissors
- glue
- black permanent marker

DIRECTIONS:
1) Find a piece of white card stock or heavy white paper to create your flag on. TIP: Cream paper would create an antique-style flag.

2) Lightly draw a flag on your card stock. Kids might want to do an abbreviated version of the flag since it might be hard to include all 50 stars and 13 stripes. NOTE: Kids can be creative with the number of stars and stripes they use. Emphasize the importance of having a red strip on top and bottom (white stripes on the outside will get dirty faster).

3) Find red and blue scrap paper pieces to form your flag with. The white sections = the white of the paper, but kids can use white paper for the star/s if they choose. Cut the pieces out with scissors and sort into a red and blue pile. NOTE: there will be a variety of blues and reds creating the flag. Consider using red/blue sections that have patterns so that it will look like fabric. Avoid using colored sections with text, solid color blocks or color patterns will work best.

4) Glue the pieces down on flag, in quilt-like sections. Start with red stripes first, then the blue section.

5) Let glued pieces dry.

6) Use permanent marker to create a stitch effect at the seam of each quilt section (the seam of each paper piece). TIP: If the flag was done as a group, consider having each kid sign their name or write a short message about America. 

7) Hang up and enjoy!

Sunday, September 7, 2008

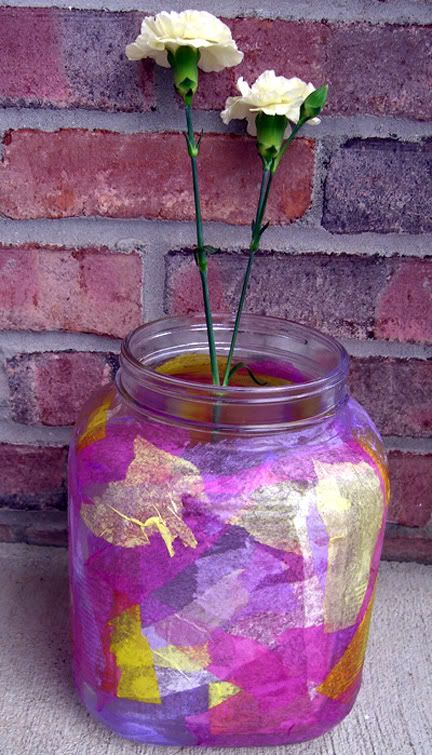
Glass Decoupage Vase


PROJECT OVERVIEW:
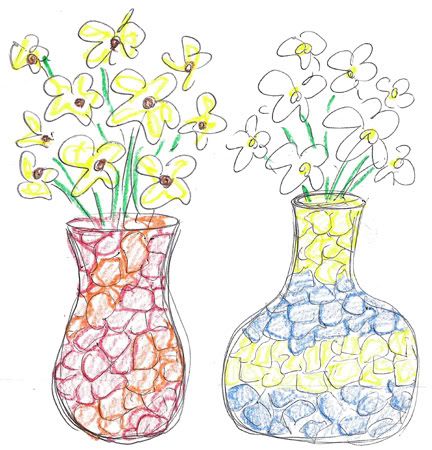
Recycle a glass container into a beautiful decoupage vase. Glue tissue paper squares onto the glass vase creating a unique color pattern.

SUPPLY LIST:
- Empty glass bottle/container that has the following:
- good vase-like shape
- smooth glass surface (no ridges or bumps in the glass)
- removable wrapper (so that it is a plain glass "vase" when removed)
**WARNING: The safest containers to use are empty food & beverage containers. Do not use a container that held dangerous chemicals/cleaners.

- colored tissue paper (2-5 different tissue paper colors)
- glue
- paper towel
- scissors (optional)

DIRECTIONS: (refer to sketches above)
1) Find a glass bottle with the above qualities to use as your vase. Below are some container ideas for a vase:
- glass salad dressing bottle (some have really unique shapes)
- glass beverage bottle (juice bottles, soda bottles, etc)
- glass vinegar or olive oil bottle (some olive oil bottles have unique square sides)

2) Have an adult rinse out/clean your vase container and peel off the outside label. *TIP: Soak in hot sudsy water to loosen stubborn labels. Let dry.

3) Select several tissue paper colors to design a pattern for your vase. 2-4 colored patterns work best.

4) Rip or cut uniform tissue paper squares to decorate your vase. Squares should be roughly 1/2" x 1/2" size for easy designing. Try to eyeball how many squares your vase will need (this depends on the size of your vase). NOTE: Ripping tissue squares will create a different effect than scissor cutting.

5) Starting from the bottom of your vase up... apply a THIN layer of glue about 1/2 way up the bottle. *NOTE: Do not cover your entire vase with glue or it may dry by the time you are ready to decorate. Decorate in sections instead.

6) Glue tissue squares onto vase pressing slightly on each square so that the entire tissue paper piece is adhered to glass. Dab any excess glue with a paper towel.

7) Create a pattern using the colors you selected. For example: stripes, polka-dots, swirls, squares, hoops, etc. Repeat the pattern until you reach the top of your vase and all glass is covered by tissue paper pieces.

8) Set aside to dry.

9) Fill vase with water and flowers! *TIP: There are many beautiful wild flowers and grasses that make a unique arrangement. Silk flowers are wonderful too!